Install GNS3 1.0 beta on your Ubuntu from scratch
Some weeks ago, GNS3 released its beta version, here is the way to install it from scratch on ubuntu/elementaryos :
1/ You need python 3.3 or higher, pip, qtmake and other stuff :
~ sudo add-apt-repository ppa:fkrull/deadsnakes
~ sudo aptitude update
~ sudo aptitude install git python3.4 python3.4-dev qt4-qmake qt4-dev-tools libzmq-dev cmake libelf1 libelf-dev uuid-dev libpcap-dev
~ cd /tmp/
~ wget http://python-distribute.org/distribute_setup.py
~ sudo python3.4 distribute_setup.py
~ sudo easy_install-3.4 pip
~ wget https://bootstrap.pypa.io/ez_setup.py -O - | sudo python3.4
Download SIP, PyQt4 from : - http://www.riverbankcomputing.com/software/sip/download - http://www.riverbankcomputing.com/software/pyqt/download
~ tar xvzf PyQt-x11-gpl-4.11.1.tar.gz
~ tar xvzf sip-4.16.2.tar.gz
~ cd sip-4.16.2/
~ python3.4 configure.py
~ make && sudo make install
~ cd ../PyQt-x11-gpl-4.11.1
~ python3.4 configure.py
~ make && sudo make install
2/ Install gns3-gui
~ cd /tmp/
~ git clone https://github.com/GNS3/gns3-gui.git
~ cd gns3-gui
~ sudo python3.4 setup.py install
3/ Install Dynamips
~ cd /tmp/
~ git clone https://github.com/GNS3/dynamips.git
~ cd dynamips
~ mkdir build
~ cd build
~ cmake ..
~ make && sudo make install
4/ Install gns3-server
~ cd /tmp/
~ git clone https://github.com/GNS3/gns3-server.git
~ cd gns3-server
~ sudo python3.4 setup.py install
Change the gns-server path in Edit->Preferences by /usr/local/bin/gns3server launch GNS3 with gns3
If you encounter the following issue : Could not connect to the local server 127.0.0.1 on port 8000: Websocket exception <class 'ws4py.exc.HandshakeError'>: Invalid response status: b'403' b'Forbidden'
Just install Tornado in the following version :
~ sudo pip3.4 uninstall tornado
~ sudo pip3.4 install tornado==3.2.2
5/ Bonus
For Virtualbox integration :
(Yes you have to use python2.7)
~ cd /tmp
~ git clone https://github.com/GNS3/vboxwrapper.git
~ cd vboxwrapper
~ sudo python2.7 setup.py install
Then just copying these files :
~ sudo cp -r adapters nios vboxwrapper.py tcp_pipe_proxy.py virtualbox_controller.py virtualbox_error.py /usr/local/lib/python2.7/dist-packages
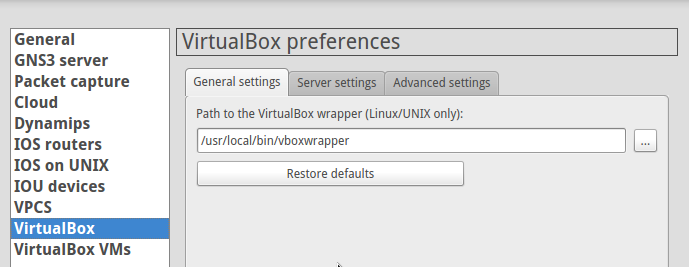
And now, just edit the vboxwrapper path in gns3 : Edit->Preferences with /usr/local/bin/vboxwrapper
IOU integration :
Installing IOU then, download and install iouyap from : http://sourceforge.net/projects/gns-3/files/Tools/iouyap.tar.gz/download
~ cd /tmp
~ tar zxvf iouyap.tar.gz
~ cp iouyap /usr/local/bin/iouyap
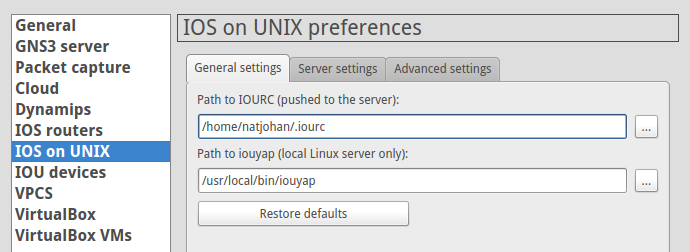
Now, put correct paths in your gns3 preferences Edit->Preferences by /home/MYUSER/.iourc and /usr/local/bin/iouyap
VPCs integration (Virtual PC):
~ sudo aptitude install subversion
~ cd /tmp
~ svn checkout svn://svn.code.sf.net/p/vpcs/code/trunk vpcs-code
or download it from : http://sourceforge.net/projects/vpcs/?source=typ_redirect
~ cd vpcs-code/src
~ sudo ./mk.sh
~ sudo mv -f vpcs /usr/bin/vpcs
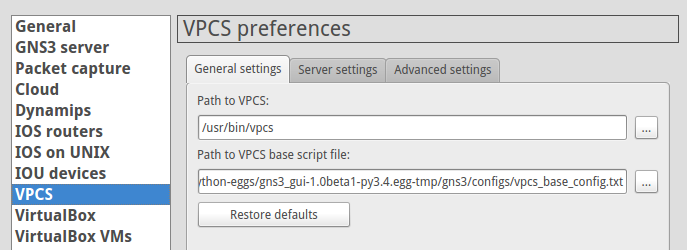
And now you can put the correct path /usr/bin/vpcs for VPCS in your GNS3 preferences
GNS3 Converter
GNS3 Converter allow you to convert your old gns3 files to get it works on the new GNS3 (http://forum.gns3.net/post35824.html) :
~ sudo pip3 install gns3-converter
Roxterm
For a multi-tabbed terminal :
~ sudo aptitude install roxterm
Then change your GNS3 settings : Edit->Preferences->General->Console applications-> Preconfigured commands and change from xterm to Roxterm
GNS3 desktop icon
Just create a .desktop file :
~ sudo vi /usr/share/applications/gns3.desktop
[Desktop Entry]
Version=1.0
Type=Application
Terminal=false
Exec=gns3 %f
Name=GNS3
Comment=GNS3 Graphical Network Simulator
Icon=gns3
Categories=Education;
MimeType=application/x-gns3;
Keywords=simulator;network;netsim;
Comments